Garden Bed Makeover
Hellooo,
Over time garden beds wear out and may require fixes and maintenance. At some point, it may even be a better idea to take them apart and restart anew. This can be helpful because you learn from your mistakes and experience gained by using them and make your new beds better than the older ones.
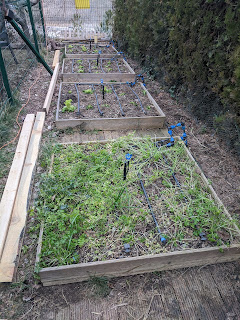
This is what I wanted to this year with our old garden beds. I would like to share a pictorial summary of the process first before sharing some thoughts. Here is how the beds looked like initially:
You can see that it doesn't look very nice and is need of some maintenance. To start with a fresh bed, I've first cleaned out these old ones:
You can see from the last photo that when I was done for the day, it was getting dark. By the way, I've been building the walls of the new garden bed using raw 2x4 inches lumber. I've not used pressure treated timber as for me it is more important to grow food safely instead of the bed being super long lasting. Some more progress in the following days can be seen below:
I've build these beds using 6.5 feet long 2x4 lumber (2 meters by 5x10 cm). During the construction, I've staggered them as follows for a sturdier construction and a nicer look. The dashed rectangle indicates the smaller pieces that I used to attach the longer pieces. So basically one of the 2 by 4's is cut into half to have a 3.25 feet piece. Two of these are put side by side and underneath of both a long 2 by 4 is placed. These are nailed together using an extra piece of wood (the dashed rectangle). For the adjacent part of the frame, the short pieces are placed below and the long piece is placed on top of them. This pattern goes alternatingly until the end of the bed:
I then got some soil delivered and started filling out the bed. You can see in the third picture below that I've also added some sheep manure to fertilize the soil.
The next part was adding the hoops for the low tunnel. For that I simply cut a larger piece of PPRC piping in which I inserted a thinner PPRC pipe. It kind of looks like this:
I've placed these about 3 feet (90 cm) apart and installed them along the edges of the frame:
The next part was adding the plastic sheet to create a small low tunnel, also known as the caterpillar tunnel. However, if you please agree with me I would like to share the construction of this low tunnel in a separate post. For now let's finish this post with see a side by side comparison of the before and after of the garden bed make over:
|
|


Comments
Post a Comment